Your wedding day is one of your life’s most extraordinary and memorable moments, and every detail should be as beautiful and unique as you are. Creating your DIY wedding bouquet is one way to give an individual trace to your wedding. It will save you money, allow you to express your creativity, and make something extraordinary that you can cherish for years.
Whether you’re going for a classic, bohemian, or modern look, making your wedding bouquet is a fun and rewarding project that will add a special touch to your big day. So, let’s start by creating the perfect bouquet to make your wedding day unforgettable. In this blog, we go through how to make a DIY wedding bouquet.
The benefits of DIY bouquets
There are numerous benefits to creating your DIY bridal bouquet:
It allows you to save money by avoiding the high costs of hiring a professional florist.
You have complete control over the flowers, colors, and arrangement, allowing you to create a bouquet that perfectly matches your vision and theme. DIY wedding bouquets also will enable you to incorporate sentimental items such as family heirloom jewelry or a special ribbon into the design.
Making your bouquet can be a fun and memorable experience that you can share with loved ones, creating a special moment leading up to your big day.
Creating your homemade wedding bouquets adds a personal touch and uniqueness to your wedding, making it an exceptional and unforgettable experience.
How to source flowers for DIY bridal bouquets
When sourcing flowers for your DIY bridal bouquet, there are a few options to consider. One preference is to buy flowers from a local flower market or florist. This allows you to handpick the flowers you want and ensure their quality.
Another option is to order flowers online from a reputable retailer or wholesaler. This option may be more convenient, but it’s essential to examine the organization’s standing and go through reviews before purchasing.
Lastly, consider using flowers from your garden or asking buddies and relatives to pay for your bouquet. Whatever option you choose, be sure to plan, order or purchase enough flowers, and have a backup plan in case of any unexpected issues.
1. What do you need
When creating your homemade wedding bouquets, there are a few essential items that you will need to make the process easier and more efficient. Here are some of the critical supplies and materials to consider:
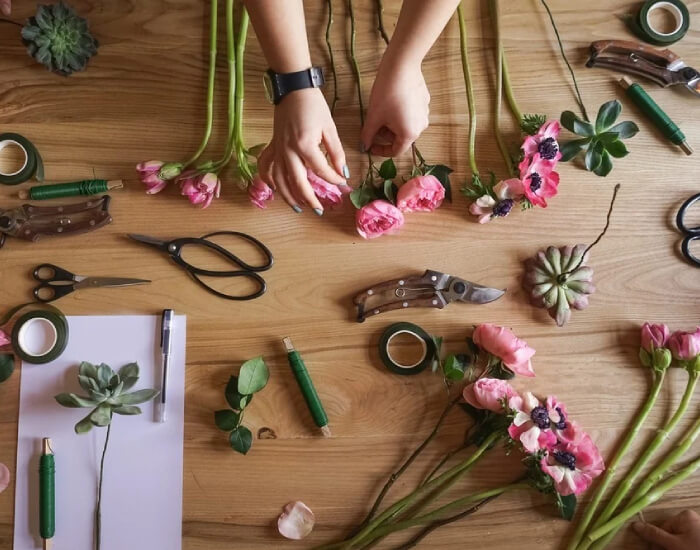
- Flowers of your choice, either purchased or gathered from your garden.
- Solid scissors or flowered snips to cut the branches of the flowers and greenery.
- Floral tape to secure the stems together and create a sturdy base.
- Floral wire or twine to wrap around the stems for added support.
- Ribbon or lace to cover the stems and add a decorative touch.
- Pins or corsage pins to secure the ribbon in place.
- Optional: foliage or greenery to add texture and volume to your bouquet.
When selecting the flowers for your homemade wedding bouquets, choosing blooms that are in season and will hold up well throughout the day is essential. Some popular flowers for wedding bouquets include roses, peonies, hydrangeas, ranunculus, and dahlias.
Choosing a color palette that complements your wedding theme and the overall aesthetic is also essential. With these supplies and materials, you can create a beautiful and personalized DIY bridal bouquet that perfectly reflects your style and vision.
2. Get rid of the leaves
Removing the leaves from your flowers is essential in preparing them for your homemade wedding bouquets. There are some causes why you should remove the leaves:
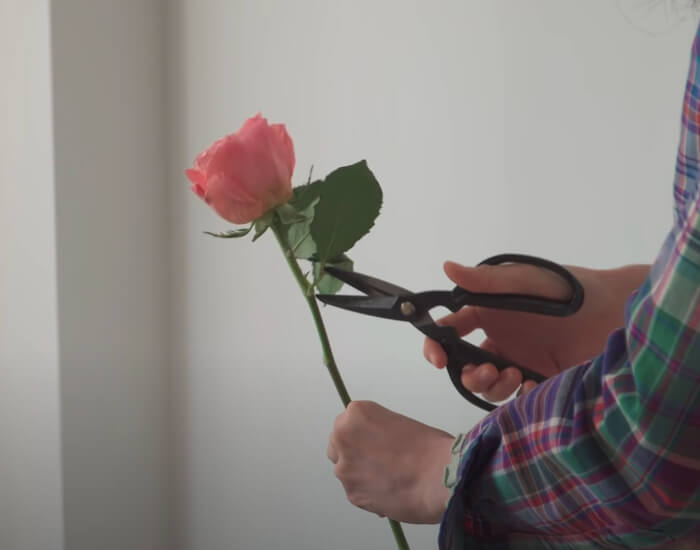
- Aesthetics: Leaves can detract from the overall appearance of your bouquet, making it look cluttered or messy.
- Preservation: Leaves tend to wilt and decay faster than flowers, which can lead to bacteria growth and shorten the lifespan of your bouquet.
- Structure: Removing the leaves allows you better to control the structure and shape of your bouquet, making it easier to arrange and secure the stems.
To remove the leaves, use scissors or snips to cut them off at the base of the stem. Be sure to remove all the leaves until you want your bouquet to start, typically about one-third of the way down the stems. This will ensure your bouquet looks neat and well-arranged and help keep it fresh and beautiful throughout your special day.
3. Pick your first flower
Picking your first flower for your homemade wedding bouquet is exciting, but choosing the right one is essential to set the tone for the rest of your arrangement. Consider the following tips when selecting your first flower:
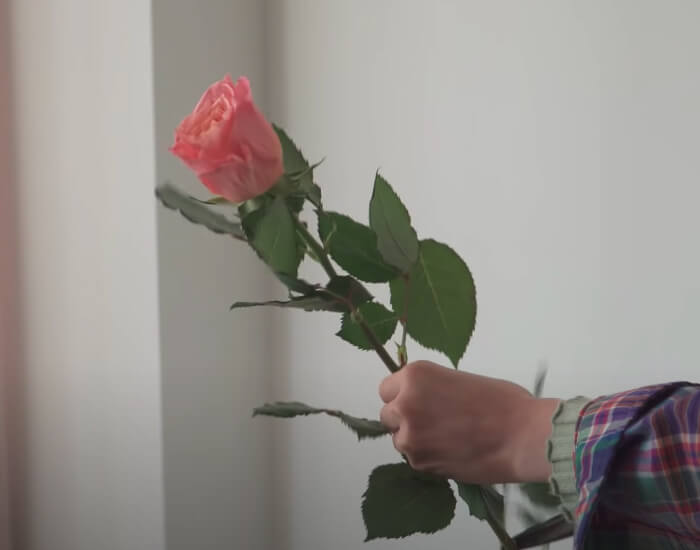
- Choose a statement flower: A statement flower, such as a large rose or peony, can serve as the centerpiece of your bouquet and set the overall tone for the rest of your flowers.
- Think about your color palette: Select a flower that complements the colors of your wedding, whether it be a soft blush pink or a vibrant purple.
- Consider the season: Opt for flowers in season, as they will be fresher, more affordable, and hold up better throughout the day.
Remember, this is your bouquet, so choose a flower that speaks to you and reflects your style and vision for your special day.
4. Add another flower
Choosing the second flower for your DIY bridal bouquet can be as important as selecting the first.
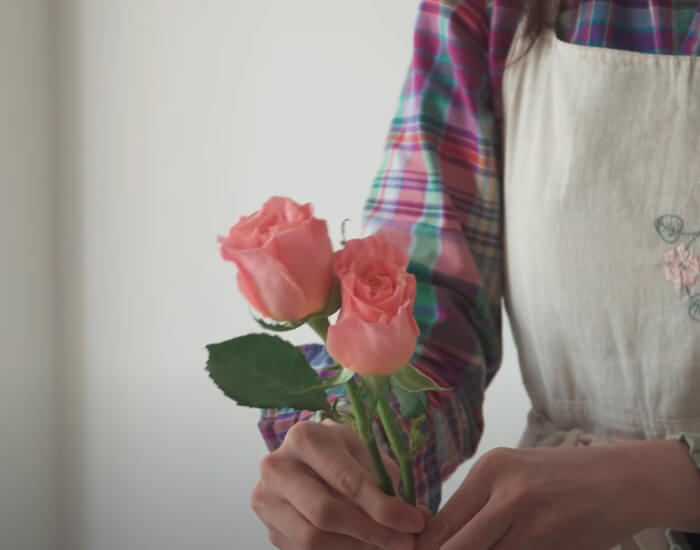
Here are a few suggestions to hold in mind when adding another flower to your arrangement:
- Complement your first flower: Choose a flower that complements the color and texture of your first flower, creating a cohesive and harmonious look.
- Add variety: Incorporate a flower with a different shape or texture to your bouquet, such as a spiky delphinium or fluffy astilbe.
- Think about the season: If you’re having a summer wedding, consider adding sunflowers or daisies, while a winter wedding could benefit from adding anemones or hellebores.
Remember, each flower you add to your bouquet should function jointly to form a stunning and cohesive arrangement. Feel free to experiment and try different combinations until you find the perfect mix for your special day.
5. Continue adding flowers
As you continue adding flowers to your DIY bridal bouquets, remember the overall look and feel you’re going for.
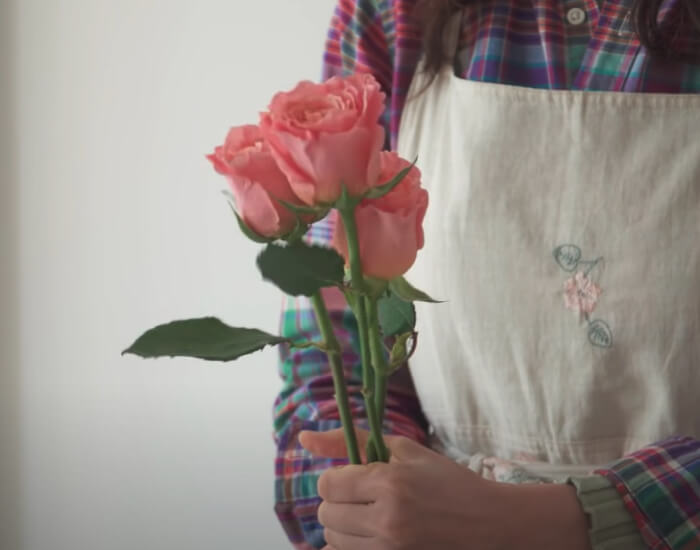
Here are a few more suggestions for selecting and adding flowers:
- Vary the sizes: Mix different sizes of flowers to create depth and interest in your bouquet. Smaller filler flowers, such as baby’s breath or waxflower, can complement a large statement flower.
- Add greenery: Add some greenery, such as eucalyptus or ferns, to add texture and volume to your bouquet. It can also serve as a natural filler between the flowers.
- Keep it balanced: Look back at the bouquet as you add flowers. Ensure it feels balanced and has no noticeable gaps or clumps of one type of flower.
Remember to have fun and experiment as you add flowers to your bouquet. With each addition, you’ll be one step closer to creating a unique and beautiful arrangement that perfectly reflects your style and vision for your wedding day.
Related Post: Different Types Of Wedding Flower Arrangements?
6. Add filler flowers
Adding filler flowers to your homemade wedding bouquets is a great way to create your arrangement’s volume, texture, and depth.
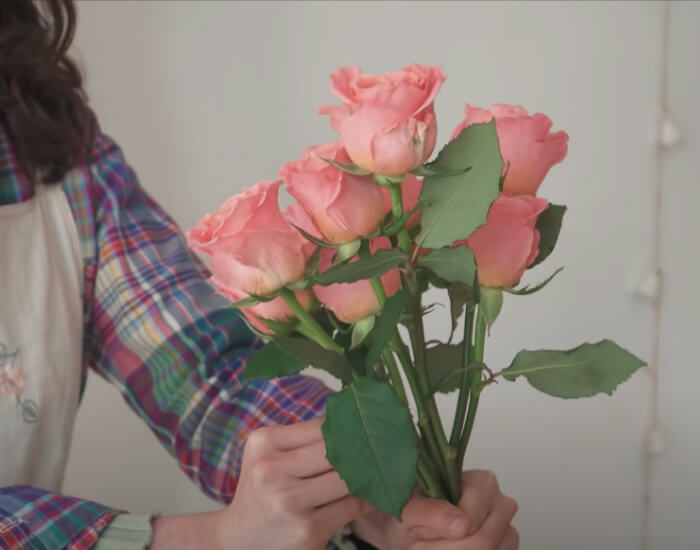
Here are a few suggestions to regard when selecting and adding filler flowers:
- Choose complementary colors: Select filler flowers that complement the colors of your statement and accent flowers to tie everything together.
- Vary the textures: Incorporate filler flowers with different textures and shapes, such as fluffy baby’s breath, spiky statice, or delicate Queen Anne’s lace, to create visual interest.
- Use them strategically: Use filler flowers to fill in any gaps or spaces between your statement and accent flowers or to create a natural-looking flow between different sections of your bouquet.
Adding filler flowers to your bouquet can help create a lush and romantic feel that is perfect for a wedding. With these tips, you can choose the perfect filler flowers that complement your statement and accent flowers and create a beautiful and balanced bouquet.
7. Tie the flowers together
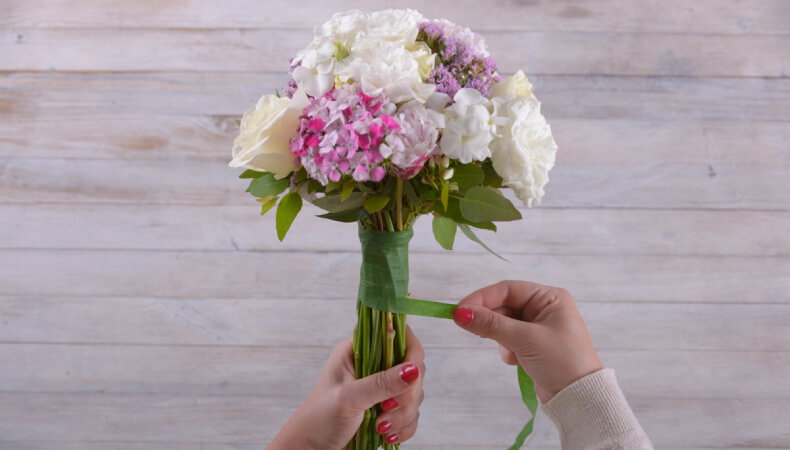
Tying your homemade wedding bouquets is crucial in creating a beautiful and cohesive arrangement. Here are a few suggestions to consider when tying your flowers together:
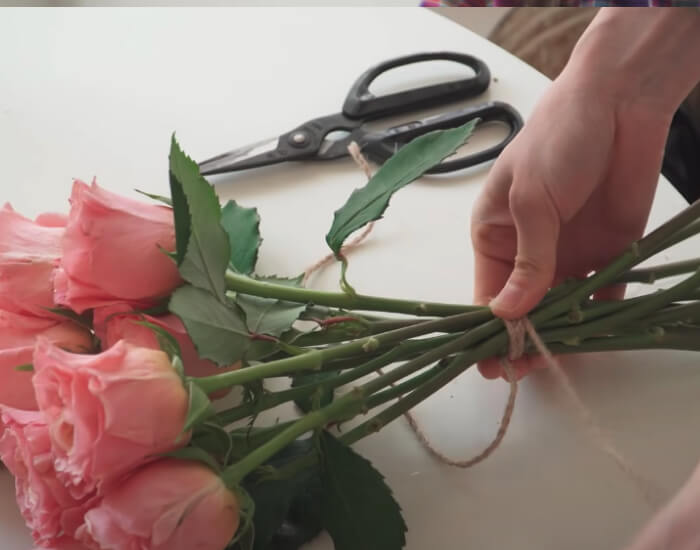
- Use floral tape: Floral tape is an excellent option for securing your flowers, as it is flexible and will conform to the shape of your bouquet. It is also less likely to slip or come undone than string or ribbon.
- Start with a tight grip: Hold the stems of your flowers tightly together at the base of your bouquet to create a strong foundation.
- Wrap tightly: Wrap the floral tape around the stems, working your way toward the top of the bouquet. This will aid in keeping the flowers in position and create a sturdy handle.
- Add ribbon: Once the floral tape is in place, wrap a ribbon around the stems to cover the tape and add a decorative touch.
Tying your bouquet is essential in ensuring your flowers stay together and look beautiful throughout your wedding day. With these suggestions, you’ll be capable of making a gorgeous and long-lasting bouquet that you’ll cherish for years to come.
Also See : How Do You Do a Simple Wedding?
8. Cut the stems
Cutting the stems of your homemade wedding bouquet is crucial in preparing your flowers for the big day. Here are a few suggestions to hold in mind when cutting the stems:
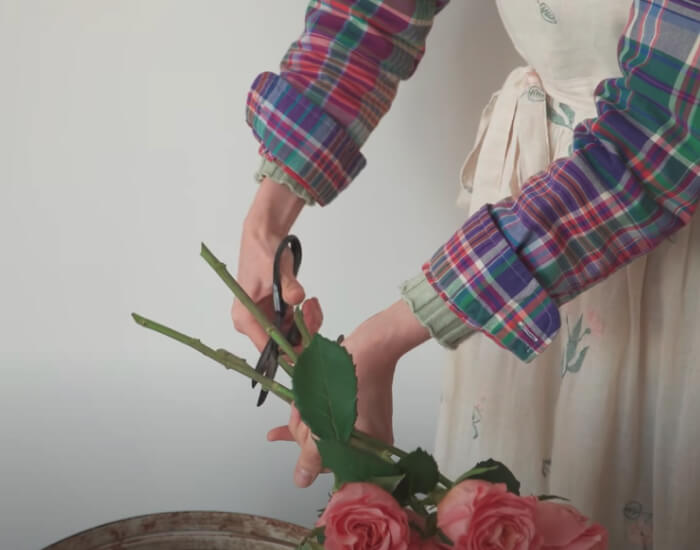
- Use sharp scissors or a floral knife: A sharp blade will make clean cuts that won’t damage the stems or inhibit water absorption.
- Cut at an angle: Cut the stems at a 45-degree angle, creating a larger surface area for the flowers to absorb water and nutrients.
- Cut to the correct length: Your stems will depend on your bouquet size and how you plan to display them. The stems should be about 1.5 times the height of your vase or holder.
- Remove any excess foliage: Trim off any foliage below the waterline in your vase, as it can cause bacterial growth and shorten the lifespan of your flowers.
Following these tips, you can create a beautifully arranged bouquet that will look stunning on your wedding day.
9. Add ribbon
Adding ribbon to your DIY bridal bouquet is a simple and elegant way to add a finishing touch to your arrangement.
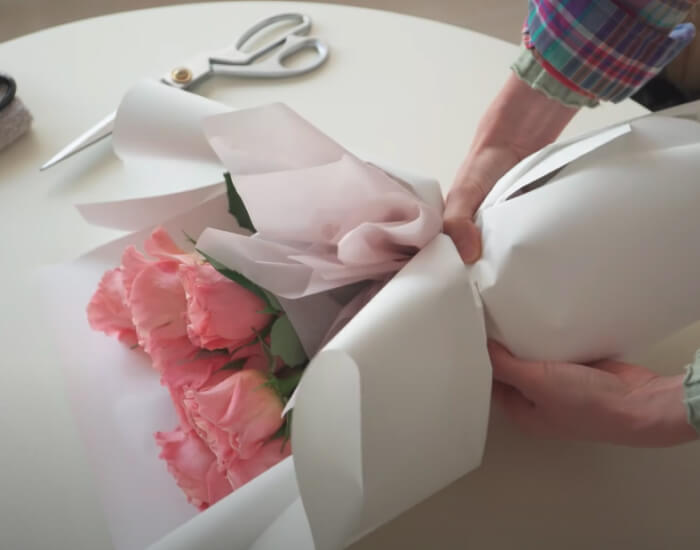
Here are a few suggestions to hold in mind when adding ribbon:
- Choose the right ribbon: Select a ribbon that complements the shades and types of your flowers. A simple white or ivory ribbon is always a classic choice, but you can experiment with different colors, textures, and patterns.
- Cut the ribbon to the right length: Cut the ribbon to a length that allows for a bow or knot to be tied while still leaving enough length to wrap around the bouquet’s stems.
- Secure the ribbon: Use a small piece of floral wire or floral tape to secure the ribbon to the stems of your bouquet, ensuring it stays in place.
- Add extra embellishments: If you want to add additional detail to your bouquet, consider adding a brooch, beads, or a small charm to the ribbon.
Adding ribbon to your bouquet can be a beautiful way to tie all of the elements of your arrangement together. With these tips, you can add the perfect finishing touch to your DIY wedding bouquet.
10. Tie a knot and finish it off
Tying a knot and finishing your DIY bridal bouquet is the final step in creating a beautiful and cohesive arrangement. Here are some tips to keep in mind when tying a knot and finishing off your bouquet:
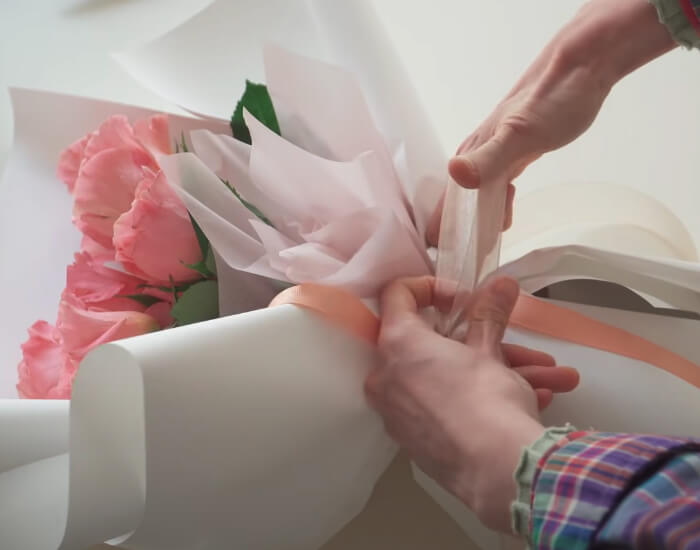
- Double knot your ribbon: Tie a double knot with your ribbon to ensure it stays in place and doesn’t unravel during your ceremony or reception.
- Cut any excess ribbon: Once your knot is tied, cut off any extra ribbon, leaving just enough to create a neat finish.
- Add a finishing touch: If desired, add extra detail to your bouquet by attaching a small charm or a piece of ribbon that matches your wedding colors.
- Keep your bouquet hydrated: Once it is finished, place it in a vase or container with fresh water and flower food to keep it hydrated and looking fresh.
Tying a knot and finishing your bouquet is essential in ensuring your flowers stay together and look beautiful throughout your wedding day. With these suggestions, you’ll be capable of creating a gorgeous and long-lasting bouquet that you’ll cherish for years to come.
11. Take care, congratulations, and enjoy
Congratulations on creating your own beautiful DIY bridal bouquet! With all the hard work that went into it, it’s essential to take care of your bouquet to ensure it lasts throughout your special day.
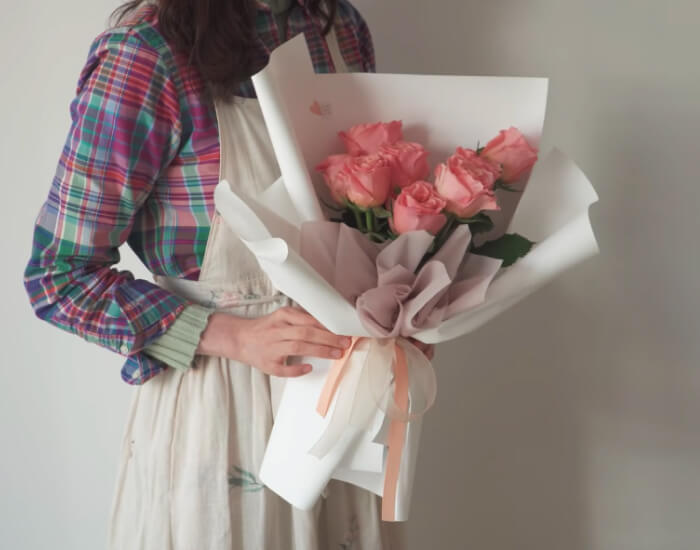
Here are a few suggestions to assist you in caring for your bouquet:
- Keep it hydrated: Make sure your bouquet stays hydrated by placing it in water as soon as possible after you finish creating it.
- Store it properly: If you aren’t using your bouquet immediately, store it in a cool, dark place to keep it fresh.
- Handle it gently: Treat your bouquet carefully and avoid touching the blooms too much, which can cause damage or bruising.
Now that your bouquet is ready to go, it’s time to chill and relish your memorable day! Take a moment to admire your beautiful creation and all the hard work you put into it. Congratulations, and have a wonderful wedding day!
In conclusion, creating your homemade wedding bouquet is a beautiful way to add a personal and unique touch to your special day. With some planning and creativity, you can create a beautiful, budget-friendly arrangement that perfectly matches your wedding style and colors. Know how to make a DIY wedding bouquet.
Remember to choose the right flowers, handle them carefully, and add finishing touches like ribbon and embellishments to complete your bouquet. With these suggestions, you’ll be capable of creating an exquisite bouquet that you’ll cherish for years. So why not make your DIY wedding bouquet and make your marriage day more memorable and unique.



![4th of July Wedding Decoration Ideas [2024] 4th of July Wedding Decoration Ideas [2024]](https://www.happywedding.app/blog/wp-content/uploads/2024/06/4th-of-July-Wedding-Decoration-Ideas-300x150.jpg)
![10 Creative Wedding Photobook Ideas and Tips [2024] 10 Creative Wedding Photobook Ideas and Tips [2024]](https://www.happywedding.app/blog/wp-content/uploads/2024/05/Creative-Wedding-Photobook-Ideas-Make-Engaging-Wedding-Albums-with-Ease-300x150.jpg)
![30+ Simple & Stylish Minimalist Wedding Ideas [2024] 30+ Simple & Stylish Minimalist Wedding Ideas [2024]](https://www.happywedding.app/blog/wp-content/uploads/2024/05/Simple-Stylish-Minimalist-Wedding-Ideas-300x150.jpg)